Many Amateur Faults Are The Result Of One Fundamental Golf Swing Flaw... And It Is Really Difficult To See!
This vital part of your golf swing could be holding you back, so we asked two of our experts for tips on how to perfect it...

Kristian Baker
Subscribe to the Golf Monthly newsletter to stay up to date with all the latest tour news, equipment news, reviews, head-to-heads and buyer’s guides from our team of experienced experts.
You are now subscribed
Your newsletter sign-up was successful
Want to add more newsletters?

Delivered daily
Daily Newsletter
Sign up for all the latest tour news, gear reviews, head-to-heads and buyer’s guides plus features, tips from our top 50 coaches and rules advice from our expert team.

Once a week
Kick Point
Sign up to our free Kick Point newsletter, filled with the latest gear reviews and expert advice as well as the best deals we spot each week.

Once a week
Women's Golf Edit
Sign up to our free newsletter, filled with news, features, tips and best buys surrounding the world of women’s golf. If you’re a female golfer, you won’t want to miss out!
Weight transfer is really hard to see, but it’s a vital part of your swing. If you get it right, it creates speed and power and helps you deliver the clubhead to the ball on a good swing path. If you get it wrong, it can cause a lot of different faults that result in less power, poor strikes and errant shots.
In fact, a lot of the common faults that amateurs suffer from have a root cause of poor weight transfer. In this article and video, Golf Monthly Top 50 Coaches Zane Scotland and Kristian Baker share some simple steps to perfect this crucial area of your game...
How do you transfer weight in the golf swing?

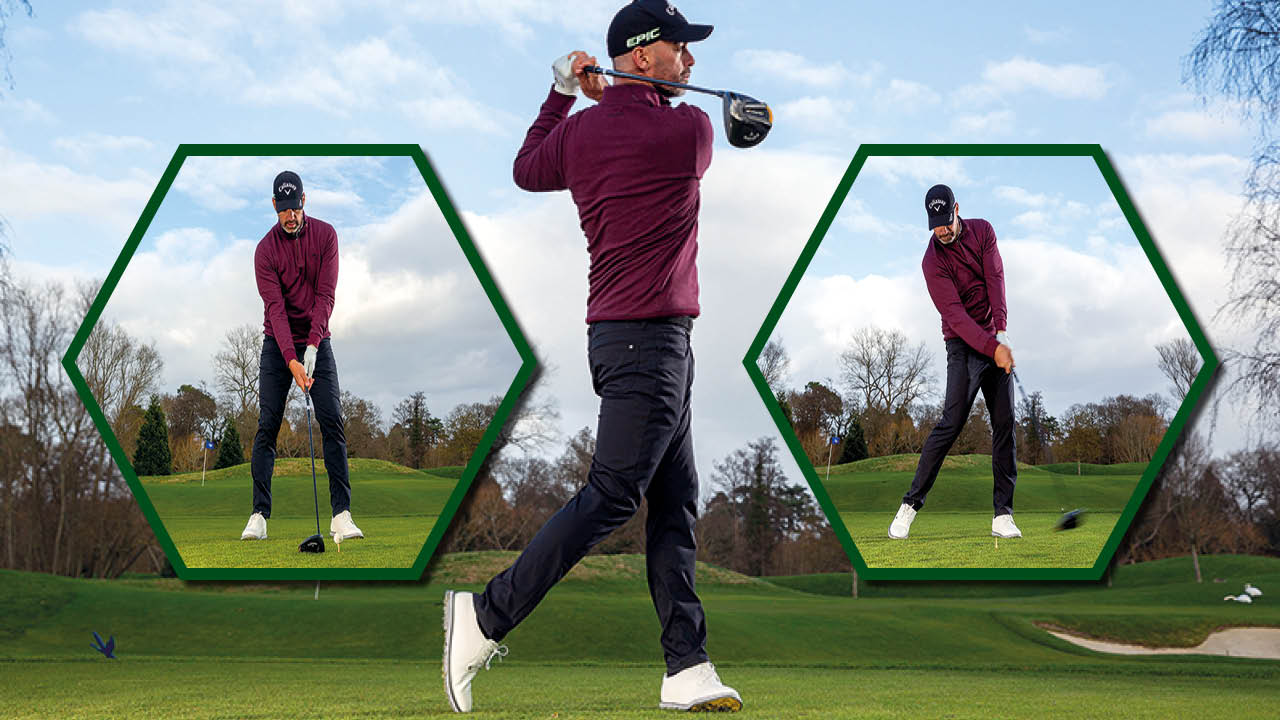
To be a good ball-striker, you need to transfer your weight into your back foot in the backswing and into your front foot in the downswing. The majority of your weight should be in your front foot at impact. This can be broken down into three simple steps.
Step 1: The backswing

Begin with about 50% of your weight on each foot at address. Start shifting your weight to your back foot as you begin the backswing. As your hands get to waist height, your body mass will be as far from the centre as it will get, but you must continue your weight transfer until you reach the top, making sure your body doesn’t slide away from the target. At the top, you should have about 75% of your weight on your back foot.
Step 2: The downswing

The first downswing move comes from your lower body transferring weight back into the front foot. Imagine you’re throwing a ball – the weight transfer and sequencing of movements is exactly the same. A good drill is to have the heel of your front foot raised at the top of the backswing and slam it into the ground as you start the downswing. You should have about 75% of your weight in your front foot at impact.
Step 3: The finish position

The finish position will tell you if you’ve transferred your weight properly. Your upper body and belt buckle should be facing towards the target and at least 90% of your weight should be on your front foot, with the heel of your back foot off the ground. You should be able to lift your back foot and stay balanced on just your front foot. Hitting shots with your back foot up in this position is a good drill if you’re really struggling.
Zane Scotland's Weight Transfer Checklist
1) Begin with about 50% of your weight on each foot at address
Subscribe to the Golf Monthly newsletter to stay up to date with all the latest tour news, equipment news, reviews, head-to-heads and buyer’s guides from our team of experienced experts.
2) At the top, you should have about 75% of your weight on your back foot
3) The first downswing move comes from your lower body transferring weight back into the front foot
4) You should have about 75% of your weight in your front foot at impact
5) When reaching the finish position, at least 90% of your weight should be on your front foot, with the heel of your back foot off the ground

Location: The Leatherhead Club
Zane has been coaching for six years after a playing career that saw him feature in two Opens. He has worked with and been inspired by the likes of David Leadbetter, Claude Harmon, Pete Cowen, Mac O'Grady and Robert Rock and he has coached a huge number of male and female tour pros in recent years.
Most common impact fault:
Not enough compression There are many ways of correcting it, hitting full speed shots and putting the brakes on post impact is one of the main ones.
A typical lesson:
Start with a conversation with some analysis and then working on which fundamental to tackle and improve - contact, power, curvature. Then help the player understand and gain clarity on the improvements that can be made and map out how we are going to tackle them. Then will demo improvements and, if needed, move through different drills and feels to get the best ones for the player. After a time of learning the new improved feels and moves we will do some performance drills as to see how much or how little the player can use straightaway and what is more long-term work that may take some time to show up in performance. We will close the session by agreeing on a practice/training plan going forward and then I will make a video with the client watching so they have that 3-5 minute video for reference when they go to practise/play on their own.
Students learn best when…
When they are open and are comfortable enough within the environment to fail. Helping them understand that when we are together working on their game that they are in a place where they are allowed to fail they are able to learn at a better rate.
- Kristian BakerTop 50 Coach